Gardening

National Gardening Week

Succulents-shells

Year-Round Interest in 5 Simple Steps 

National Gardening WeekAs it’s National Gardening Week I thought I would do something a little different in the garden.

Instead of the usual flowering basket I’m going to tackle this easy project from our Seasonal Garden Ideas book.

It only takes a few minutes but should give interest throughout the year.

Cute!

Succulents & Seashells

Succulents are often grown as indoor house plants, but many varieties are perfectly hardy and do well outdoors – if given full sun and really sharp drainage. Striped and whorled seashells make perfect partners for these shapely rosettes.

Plant in spring. Succulents like these usually flower in June and July but their thick, fleshy leaves provide year-long interest. Creating a display like this will take one to two hours.

What you need

Plants

Selection of houseleeks (Sempervivum) and echeverias – read the plant labels carefully to check that the ones you choose are fully hardy. Sempervivum arachnoideum, S. tectorum and Echeveria elegans – and their numerous varieties and colour forms – are some to look for.

Equipment

  • Large stone terracotta or ceramic container with drainage holes at the bottom.
  • Gritty compost, such as that sold for cacti.
  • Broken crocks for drainage.
  • Selection of seashells.
  • Fine gravel or grit for a topping.
  • Trowel.

Instructions

1 Line the container with broken crocks for drainage, then fill it nearly full with gritty compost.

2 Carefully tip the rosettes out of their pots – the leaves can break off easily, so handle very gently – and plant them in the compost, leaving room for the shells.

3 Top up the compost with the fine gravel or grit – allow for at least a 2.5cm (1in) layer. Then pile up the shells around and between the succulents.

4 Water moderately, then follow the plant label instructions for subsequent watering. Position the container in full sun and bring into a sheltered area during winter.

Tips

As an alternative to seashells, try pebbles or cobbles of various shapes, sizes and colours. These plants also do really well in rockeries or on the top of drystone walls.

Notes

It can take quite some time for a houseleek or echeveria to flower – and when it does, that rosette dies, but it is quickly replaced by new ones. The leaves of some varieties change colour in summer, turning from green or silvery grey to red or bronzed.

Aftercare

Deadhead flowers as they wither (they usually appear in summer). Remove any withered or damaged leaves.

Seasonal Garden IdeasSeasonal Garden Ideas is a beautiful
book featuring simple projects, with
easy-to-follow instructions, to add
beauty to any garden.

You can order a copy for just £3.99.

Buy Seasonal Garden Ideas

#seasonalgardenideas

#nationalgardeningweek

A Splash of Colour and Instant Curb Appeal in 4 Simple Steps

PLANTING SPRING POTS

A Splash of Colour and Instant Curb Appeal in 4 Simple Steps

Garden centres are filling up with beddings plants and we can finally say goodbye to winter on Sunday with the official start of spring.

Celebrate the new season by creating a splash of colour at the front of your house.

For just a few pounds and a few minutes
you can give your home instant curb
appeal with some gorgeous flowers.

In this feature from our Seasonal Garden Ideas book we show you show.


Playing a Supporting Role

A single giant pot with a very large plant can look a bit stark – surrounding it with smaller containers holding a variety of colourful flowers will soften the overall effect.

Buy a bedding strip of pansies, and several pots of white narcissi in bud in March for flowering in April and May.

Planting one pot like this takes less than an hour, but if you want to surround a large container with many smaller ones, allow an afternoon for the job.


What you need

Plants

  • Bedding strip of six to eight blue pansy (Viola) plantlets.
  • Six white Narcissus ‘Petrel’ in bud.

Equipment

  • Terracotta pot.
  • Soil-based potting compost.
  • Broken crocks for drainage.
  • Trowel.
  • Extra terracotta pots, if required, to surround the planted container.

1 Line the terracotta pot with a layer of broken crocks for drainage.

2 Start filling with compost, then ascertain the right height for the narcissi by placing them in their pot on the compost – the rootball/bulbs should be about 4cm (1½in) below the rim of the terracotta pot.

3 Position all the narcissi, spacing them out as evenly as possible, firm in by twisting each one slightly, then top with more compost.

4 Plant the pansies in the same way, positioning them around and in front of the pot. Firm them in, finishing with a final layer of compost. Bump the pot gently to settle the plants and compost, then water thoroughly.

Tip

The beauty of this arrangement is that when the pansies and narcissi have finished flowering, you can replace the whole pot with another display. With the wide range of narcissi and pansy colours available, you can choose any number of variations on this theme – or go for something completely different.

Note

The pansies may well flower a lot longer than the white narcissi. In this case, cut down the narcissi stalks when the flowers have withered and allow the pansies to continue on their own.

Aftercare

Deadhead the pansies regularly to ensure a long and continuing display of flowers. If the narcissi start bending over (in high winds or rain), support with thin bamboo canes and soft string ties.

Seasonal Garden Ideas if available for just £3.99 at http://www.dairydiary.co.uk/gift-books.html


#springflowers

National Nest Box Week

How to build a bird box

.

Step-by-Step DIY Birdbox

This week is National Nest Box Week, an initiative set up to encourage everyone to put up nest boxes in their local area in order to enhance biodiversity and conservation of our breeding birds and wildlife.

Natural nest sites for birds such as holes in trees or old buildings are disappearing fast as gardens are tidied and old houses are repaired.

Taking part in NNBW gives you the chance
to contribute to bird conservation whilst
giving you the pleasure of observing any
breeding birds that you attract to your nest box.

And here is a step-by-step guide to making a bird box.

Seasonal Garden Ideas £3.99This project is taken from our
Seasonal Garden Ideas book,
available to buy for just £3.99!


A Box for the Birds

Encourage small songbirds into your garden with a tailor-made nest box – this small-hole version is suitable for blue and great tits, coal tits and tree sparrows.

You can make the box at any time of year, but try to put it into position in January. Birds can start looking for nesting sites pretty early.

Making the box and putting it up should take an afternoon.


What you need

  • Saw, sandpaper, screwdriver, hammer, tape measure, pencil, drill, drill bits including a 28mm wide bit for the entrance hole.
  • One piece of sawn, untreated timber measuring 1.2m (4ft) long, 15cm (6in) wide and 1.25cm (¾ in) thick.
  • Two brass hinges and screws.
  • Water-based wood preservative and brush.
  • Hook or strong nail for hanging the box.

1 Mark out all the pieces on the timber using tape measure and pencil, to the following dimensions:

  • Back 30cm x 15cm (12in x 6in).
  • Floor 11cm x 15cm (4.5in x 6in).
  • Front 18cm x 15cm (7in x 6in).
  • Roof 20cm x 15cm (8in x 6in).
  • Side panels x 2 (cut for the sloping roof) 20cm (8in) high at the back, 18cm (7in) high at the front, 15cm (6in) at top and bottom.

2 Cut out the six sections accurately with a saw.

3 Sand all rough edges smooth – any splinters could damage the birds. Drill several small holes in the floor piece for drainage.

4 Fix one of the sides to the floor of the box using three nails set at intervals, then nail both of these to the back section – three nails per join are enough.

5 Turn the box on to the fixed side and nail the second side on to the back and floor.

6 Make the entrance hole for the birds in the front using a drill and 28mm wide drill bit. Position this hole at least 13cm (5in) up from the floor so the baby chicks can’t fall out. Sand the edges of the hole smooth.

7 Turn the box on its side and nail the front piece to the sides. Everything should fit together tightly without gaps. Screw the brass hinges on to the roof and back pieces.

8 Drill a hole in the top of the bird box for attaching to a tree trunk or branch via a hook or nail. Paint the outside of the box with a water-based wood preservative but do not allow the preservative to get inside the box – it will poison the chicks. Also keep the preservative away from the entrance – the adult birds often tap this area with their beaks before entering.

9 Position the box in a sheltered site, preferably between north and east to avoid heavy rain and hot afternoon sun. Place it high enough to be out of reach of prowling cats. Don’t position it near a bird feeding table – the constant coming and going of other birds will deter the parent birds from using the box.

Tips

Hanging the box about 2m (7ft) above ground should be enough to deter predators. Tilt the box slightly forwards when fixing it in place to aid water run-off.

Aftercare

Don’t be tempted to look in the box while baby birds are inside – such disturbance may cause the parents to desert the nest. Just watch comings and goings from a distance.

When the chicks have fledged and left the box, take it down, remove old nesting material and clean it thoroughly with scalding hot water – this is enough to kill any parasites.

Reapply water-based preservative if needed to prolong the life of the box, then hang it up again.


#NNBW

#SGI

#birdbox

Create a gorgeous garden by planting a tree

Tree

Create a gorgeous garden by planting a tree – Dairy Diary shows you how

We might not be spending much time in the garden at the moment, but the long dark evenings give us a great opportunity to plan for the spring and summer.

Use Pinterest to create inspiring moodboards with images of gardens and plants that you love. You could even plan to plant a show-stopping tree.

In the 2016 Dairy Diary we show you how to choose the perfect spot and the ideal specimen.

Dairy Diary 2016The Dairy Diary is still
available to buy here
or by calling 01425 463390.


Grow your own tree

How to plant a treeTrees, beautiful and ever-changing, bring a reassuring sense of continuity – plant a tree and in the normal course of events it will be there for generations to come.

Besides this, the bare fact is that trees play a vital role in all our lives. We breathe in oxygen and breathe out carbon dioxide; trees do the opposite, although in fact they store carbon dioxide rather than releasing this ‘greenhouse gas’ into the atmosphere. The leaves absorb various pollutants including nitrous oxides, sulphur dioxide and carbon monoxide.

So trees not only produce oxygen but help clean the air, too, and they help to decontaminate the soil by absorbing noxious chemicals, either storing them or changing them into a less harmful state. These are the fundamental reasons why it is so important to maintain woodlands and parks, especially in urban areas.

“We breathe in oxygen
and breathe out carbon
dioxide; trees do the opposite”

There’s more: trees prevent soil erosion, slow down water run-off (particularly important in storm or flood conditions), act as windbreaks, deaden noise and give shade and shelter. They provide natural habitats for birds, insects and other animals, support other plant life and offer a terrific harvest in the form of timber, fruit and nuts, not to mention soil-enriching compost from leaf fall. Life would be poorer – not to say impossible – without trees, so the more of them the better.

At least two charities are on the case. The Woodland Trust organises tree planting, including acres of new woodland to commemorate the First World War, as does the Tree Council, which also runs National Tree Week as an annual autumn event (check websites for details). The National Trust is another great defender and planter of trees. A one-off On a less ambitious scale, you could consider cultivating your own tree. Just one would be a great asset to the garden whether deciduous or evergreen.

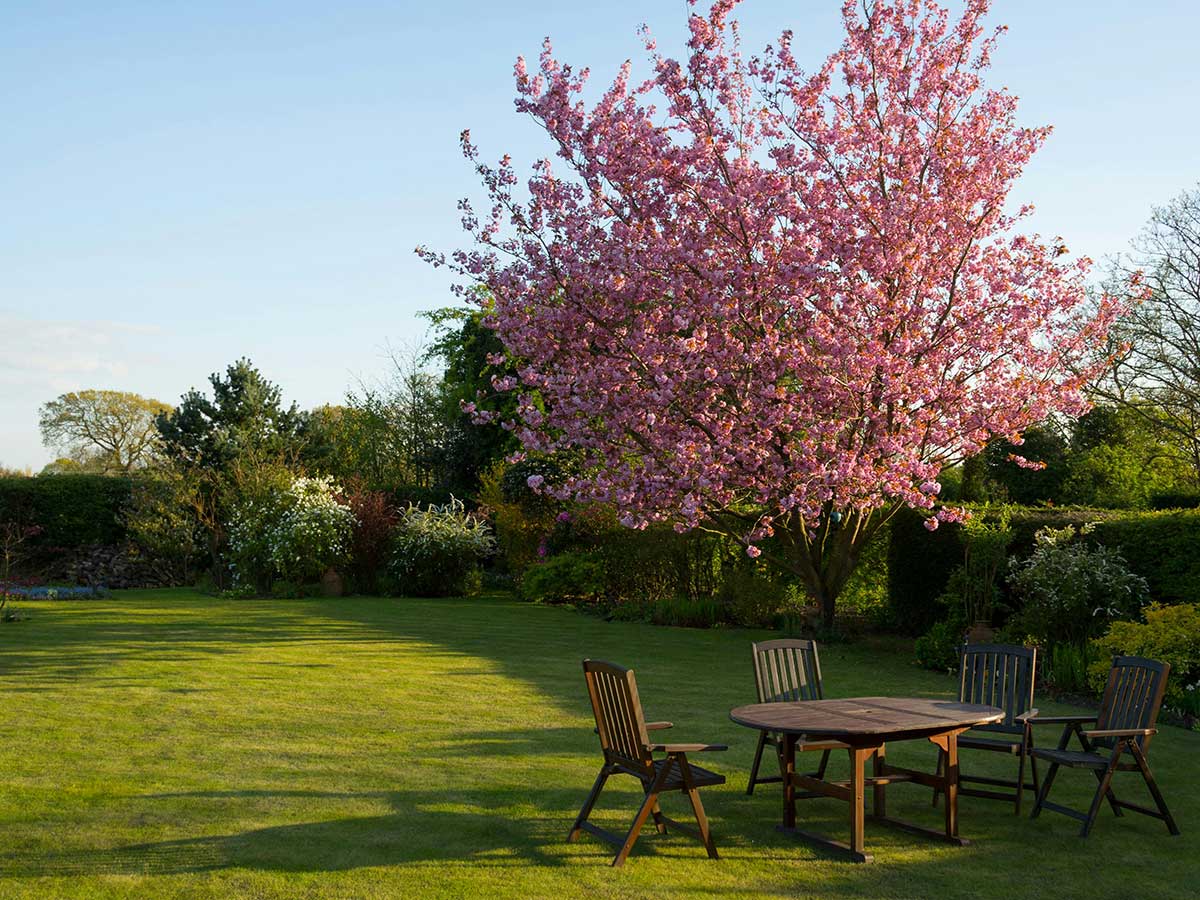
Think about whether you want one that produces lovely flowers in the spring, such as a magnolia, or has colourful foliage in the autumn, such as a maple. A fruit tree will provide you with a succulent harvest or perhaps you prefer a tree that’s purely decorative, such an ornamental cherry, paperbark maple or a weeping silver pear. Consider how tall your tree is likely to grow and how much it will spread. When deciding where to put it, and whether you want it to be a focal point in the garden, take into account how the shade cast will affect the house and the rest of the garden, and indeed your neighbour’s house and garden.

Soil type is critical. Different species of tree prefer different conditions, so don’t skimp on your research. Get the match wrong and your long-term beauty is likely to turn into a short-term flop. You can grow a small tree in a container, and thus control soil type, but position the container carefully because, once your tree starts growing, the pot may be difficult to move.

“Consider how tall your
tree is likely to grow and
how much it will spread”

Planting a Tree Autumn and winter are the recommended times to plant a tree, whether bare-rooted or container grown.

About a month beforehand, prepare the site by loosening the soil and digging in some organic matter or fertiliser. in a wide area (about 3m/10ft). When it comes to planting, leave the tree in a bucket of water for an hour, still in its pot, if that’s how it came.

Dig the hole as deep as the roots and about three times as wide. The base of the trunk should be a fraction above the soil when the hole is backfilled. Backfilling is a job for two. Ask someone to hold the tree upright and make sure soil fills in around the roots, leaving no air pockets – best done with your hands.

Firm the soil, not too hard. No need for more fertiliser, which may damage fragile roots, but do mulch with well-rotted compost, not right up to the stem. Support the sapling with a stake or two, secured with tree ties. Remember to loosen them as the tree grows.

The young tree will need plenty of watering in its first few years (even if it rains a lot!) and it’s best to keep the area around it clear of other plants. Mulching is good but, again, not right up to the trunk because if this is constantly damp, the bark may rot.

Practicalities

It can be worrying if you have a tree near the house, but usually it’s not a problem – as far away from the house as it’s tall is a good rule of thumb, and keep it neat and well pruned. It may be a good idea to have it surveyed from time to time, so that if any problems do arise, they can be nipped in the bud. Serious subsidence or structural damage to a building are rarely the fault of a tree, although it may add to the problem; and subsidence may be a risk on clay in prolonged dry weather, since the tree taking water from the soil may cause shrinkage.

Generally, tree roots don’t block drains – only if the drain is already damaged, allowing the roots a way in. A tree is the responsibility of the landowner, and so you may be liable for any damage caused by branches breaking off in the wind, for example. Check your insurance to make sure you’re covered, and for specific conditions that may apply to your property. And before doing anything drastic to a tree, check with the Local Authority to see whether it’s subject to a Tree Preservation Order (when various restrictions apply).


Websites

forestry.gov.uk
nationaltrust.org.uk
rhs.org.uk
treecouncil.org.uk
woodlandtrust.org.uk

Charming Christmas Wreath in 3 Simple Steps

Make a Christmas Wreath

.

It’s easy to give your home the wow factor with a stunning Christmas wreath.

Inspired by some particularly beautiful specimens at our local Christmas Fair, I have decided to make my own this year.

This step-by-step project from Seasonal Garden Ideas should make it easy.

It’s traditional to hang a wreath on the door at Christmas, and there are lots to choose from in the shops – but why not make your own using the abundant and varied foliage and berries available in the winter garden?

To ensure your wreath stays fresh as long as possible, make it as near to Christmas as you can. It should only take an hour or so.

What you need

Plants: Stems, foliage and berries from as many evergreen plants in the garden as you can muster: here, variegated holly, cypress, ivy (in flower), elaeagnus, rosemary, rose hips and hawthorn berries have all been pressed into use. Aim for long stems and unblemished leaves if possible.

Equipment: Circular wreath ring from a florist or garden centre. Thin wire. Soft green string.

Instructions

1 Start with the evergreen and variegated foliage. Twist and tuck the stems into the wreath ring, securing with wire or soft string. Point them all in one direction to get a ‘wheel effect’. Work in this way all round the ring until you have a reasonably full foundation of secure foliage. Space out the variegated or bronze leaves for best effect.

2 Tie small bunches of berries together with wire or string, then tuck them into the ring at intervals in front of the foliage, again securing tightly with wire or string. The berries will be heavier than the foliage, so don’t put too many together in one bunch.

3 Hang the wreath on your door using wire or string.

Tip: If red berries simply aren’t available in your garden, invest in some really good quality, natural-looking artificial ones and keep them for use from year to year.

Notes: Other evergreen/variegated foliage leaves to try include artemisia, aucuba, choosy, euonymus, pittosporum, senecio and skimmia – as well as all the conifers. Just go into the garden and see what’s there!

Aftercare: The wreath should last reasonably well over the Christmas period, but after that the leaves will start to dry up – take it down on Twelfth Night (6 January).


Seasonal Garden Ideas £3.99This easy wreath is taken from Seasonal Garden Ideas, a lovely book with step-by-step projects for pretty garden projects throughout the year.

It’s available for just £3.99 here.

A perfect bargain Christmas gift.

Buy


#christmas

Easy Autumn Hanging Basket

I’ve been absolutely thrilled with my petunia-filled baskets this year

But they’re starting to fade now and it’s time to think about getting planters ready for an autumn display.

This little project uses a gorgeous selection of heathers, evergreens and stones and should see the baskets looking brilliant until the beginning of winter.

Autumn Hanging Basket

To make this gorgeous hanging basket…

Visit the updated tutorial on how to make this Easy Eye-Catching Autumn Hanging Basket on the Dairy Diary website: CLICK HERE FOR BLOG

And for more garden inspiration…

Check out our Ideas for the Garden blogs here. Or visit the Inspire Me page to find blogs about crafts, days out, recipe collections and more!

1 3 4 5 8